Readme
To create and run a new project using one of the starters follow the steps below.
Go to Aufy starters repository.
You can fork the repository or download the starter you want to use. Starter repository is a template repository, so you can create a new repository from it.
Find a Use this template button on the repository page and choose a Create a new repository option.

Follow the instructions to create a new repository on your GitHub account.
Clone the repository
Clone the created repository to your local machine.
Install the .NET SDK.
Make sure you have the .NET SDK 8.0 installed on your machine. You can download it from the official website.
Open the chosen ASP.NET Core solution in the editor of your choice.
Go to src directory and find the starter you want to use. Each starter has its own solution file WebApp.[STARTER TYPE].sln.
If src/WebApi directory contains one project:
Open the command line in the src/WebApi folder and run the following command to create a new Sqlite database and apply migrations.
dotnet ef database updateIf src/WebApi directory contains multiple projects:
Open the command line in the src folder and run the following command to create a new Sqlite database and apply migrations.
dotnet ef database update -p ./WebApi/WebApi.[STARTER TYPE].csproj -s ./WebApi/WebApi.[STARTER TYPE].csprojIf operation completed successfully, you should see the new app.db file in the src/WebApi folder.
Configure JWT Bearer authentication.
Open the appsettings.json file in the src/WebApi folder and configure the JwtBearer section.
"Aufy": { "JwtBearer": { "SigningKey": "xxx", "Issuer": "[Your Issuer]", "Audience": "[Your Audience]", }}Change the Issuer and Audience values to your own.
Next, go to the secret.json that is already set in the WebApi project file. You can change the name, but it’s not necessary.
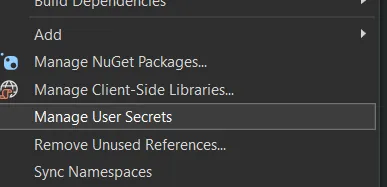
From Visual Studio, right-click on the WebApi project and choose Manage User Secrets.
Provide a secret value for the SigningKey property, that will be used for signing JWT tokens on your local development environment.
{ "Aufy:JwtBearer:SigningKey": "[At lest 256 bits long key]"}More about managing secrets in ASP.NET Core can be found here
Configure dev certificates.
WebApi and Client projects are configured to use HTTPS. To run the application locally, you need to trust the development certificates.
Windows
For windows, you can run the following command in the command line to trust the development certificates.
dotnet dev-certs https --trustThis will allow to run the WebApi project with HTTPS.
The certificate for Client project will be automatically created when you run the project.
Linux
As linux doesn’t support the —trust flag, you need to manually trust the development certificates for web browsers.
You can follow the instruction on the stackoverflow. This will allow to run the WebApi project with HTTPS.
Unfortunately, the certificate for Client project will not be automatically created when you run the project. For some reason it doesn’t work out of the box like on Windows.
You can create it manually by running the following command:
dotnet dev-certs https --format pem -ep /home/[YOUR_LOCAL_USER_DIR]/.aspnet/https/aufy.client.pem --no-passwordMacOS
TODO
Configure social logins.
Starters come with Discord and GitHub social logins pre-configured, but you need to provide your own client IDs and secrets.
TODO - tutorial on create Discord and GitHub apps.
Callback urls for Discord and GitHub are on localhost:
- Discord:
https://localhost:7050/api/auth/external/callback/discord - GitHub:
https://localhost:7050/api/auth/external/callback/github
The api/auth/ is default prefix for auth endpoints. If you change it, you should also change the callback urls.
Once you got your client IDs and secrets, open secrets.json file in the WebApi project and add the following configuration:
{  "Aufy:Providers:GitHub:ClientId": "[Your GitHub client ID]",  "Aufy:Providers:GitHub:ClientSecret": "[Your GitHub client secret]",
  "Aufy:Providers:Discord:ClientId": "[Your Discord client ID]",  "Aufy:Providers:Discord:ClientSecret": "[Your Discord client secret]"}
Run the WebApi project.
WebApi comes with two pre-configured launch profiles:
WebApiWithClient- runs the WebApi project and the Client project using SPA Proxy.WebApi- runs only the WebApi project. You need to run the Client project separately withnpm run devcommand.